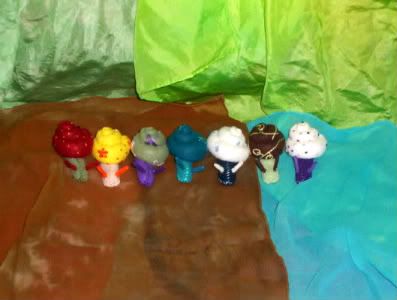
A few years ago, I made alot of felt toys for my kiddos. I found a Waldorf inspired craft book that had a pattern for some really cute snails in it. Well, I was on a board that had alot of mamas on it also making felt toys for their kiddos and they were confused by the instructions in the book. So I made a set of detailed instructions. The book is called: Feltcraft by Petra Berger
Here are my instructions:
Materials
Pattern from Feltcraft by Petra Berger
wool felt or wool blend felt
pipe cleaner or thin wire
embroidery floss to match or compliment felt
card stock or scrap piece of cereal box or other thin cardboard
wool for stuffing
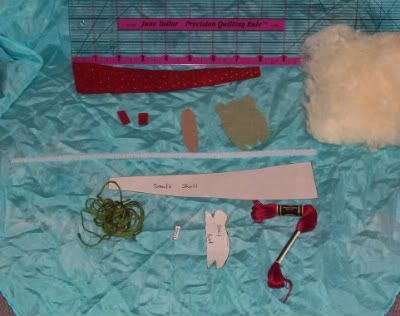
Tools
scissors
needle
bamboo skewer (or anything skinny with a blunt end to stuff the shell)
Hints
1. I cut the "horns" for the snail wider than the pattern. Basically double the thickness of the pattern. I've found it makes it easier to sew on.
2. Use scrap pieces of felt to cut out the horns.
3. I've found cereal boxes to be the best thing to use in the bottom of the snail body to ensure that it stays upright.
4. Using a bamboo skewer's blunt end to fill the shell was the best thing I found to stuff the shell.
5. I've found that stuffing the shell as you sew it is the easiest way to stuff it. Because of the small size of the shell, the wool tries to ball up before it gets where you want it.
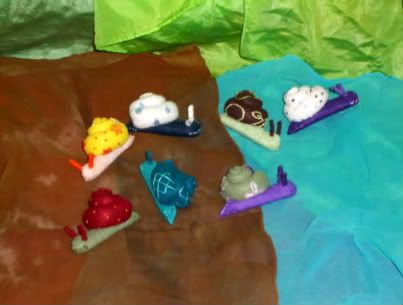
6. The shells look good plain or decorated. You can do strips, dots, flowers, etc.
7. Shape the cardboard with a little notch for the neck, so that it makes the head of the snail look nicer. The pattern for the cardboard piece is not in the book but its well worth the effort to make yourself.

Instructions
Cut snail pattern out of felt.
The shell
*If you are going to decorate the shell with embroidery, then do so now.
*Take the embroidery floss you've chosen for the shell and cut a piece 36-42 inches long. Separate 3 pieces of the floss to use to sew up the snail body. Set aside the other to use later.
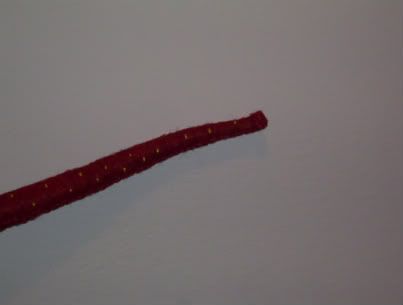
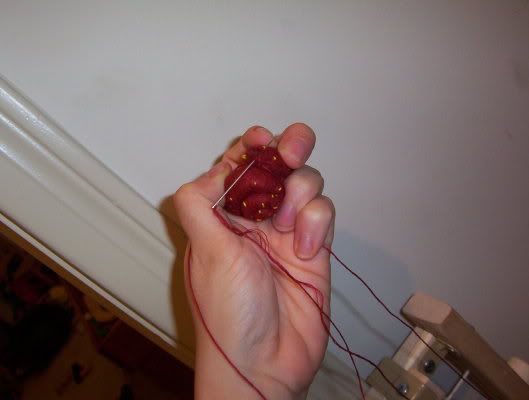
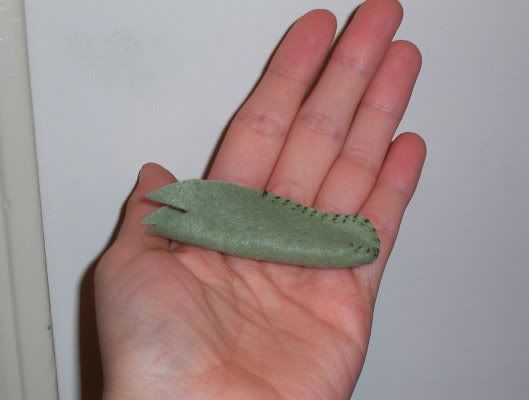
* Start at the small end of the shell. Fold over and begin sewing. Take the pipe cleaner and bend the tip so that when you stuff it into the shell, it won't poke through the stitching or felt. When you get about 1/2 inch - 1 inch down the long side, insert the pipecleaner.
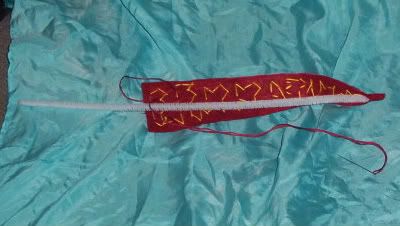
Continue to sew and stuff with wool (using the bamboo skewer if needed) as you go all the way to the end of the long side. Before you get to the end, cut the pipecleaner to the same length as the felt & fold the tip over.

When you get to the end of the long side, start a running stitch
and pull the floss tight
and knot the floss.
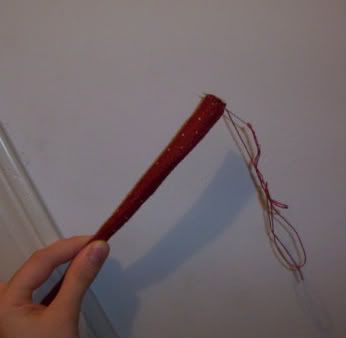
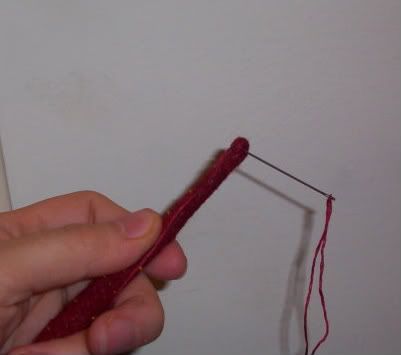
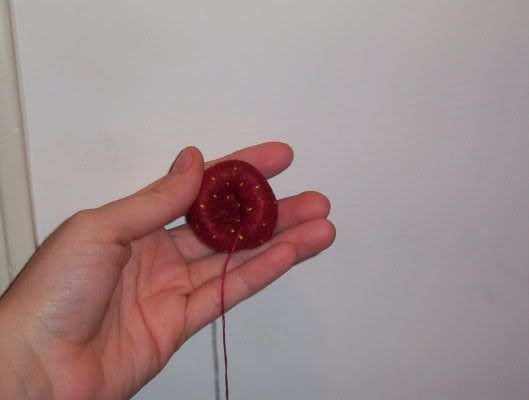
Creating the shell's spiral
Take the piece of floss that you set aside earlier and begin to spiral the shell. To do this, fold over the tip of the shell, keeping the seams to one side (this will be the underside of the shell)
Take a couple of stitches to hold it in place.
Begin to spiral the shell. I found that if you come up through the part you've already folded and down into the new section that your spiraling
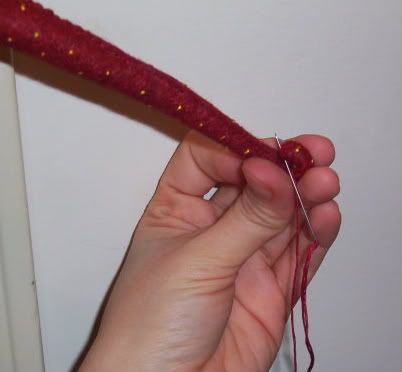
is the easiest way to sew it together. Oh and spiral which ever way is most comfortable to you. I had to do it backwards once because I did a directional print on the shell wrong and it was soooo awkward to sew.
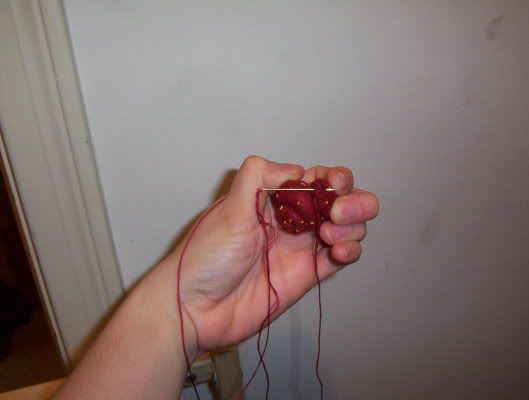
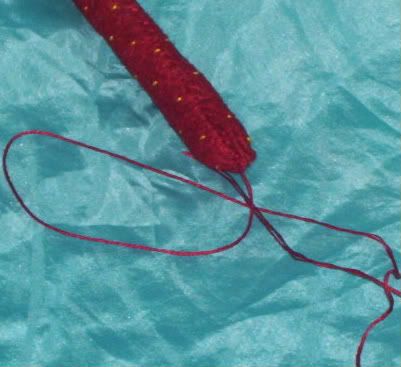
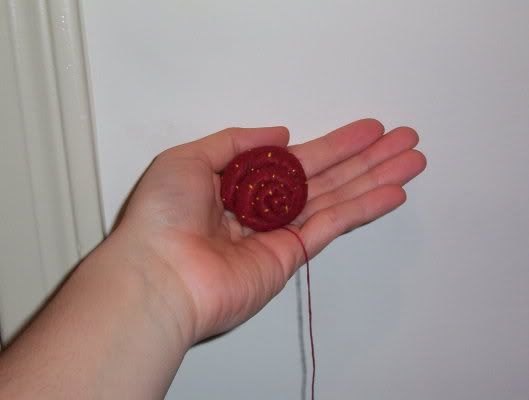
When you get to the end of the shell sew down the gathered end.
Knot the floss and trim one of the floss "tails"
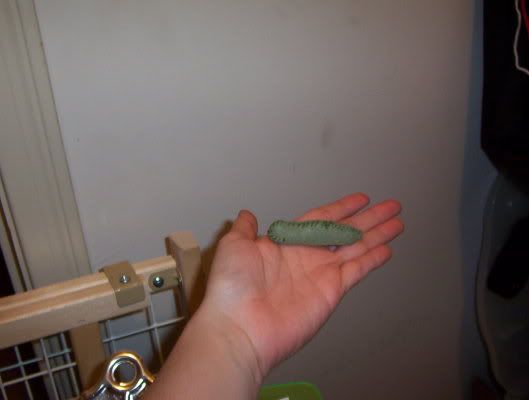
Body
Sew across the front of the head on the body and knot floss. Then sew the top seam starting from the head and stopping in the middle of the body where the shell will be and knot the floss.
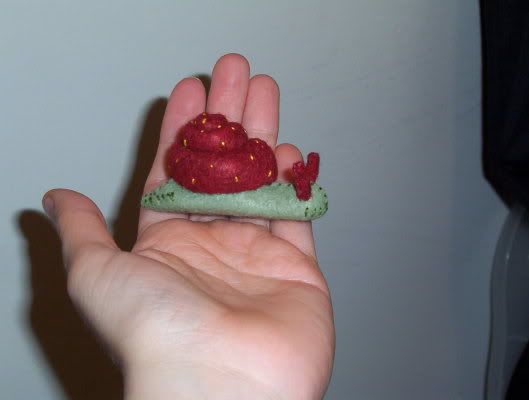
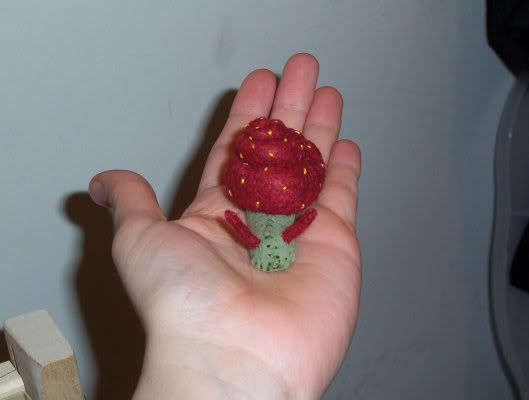
Sew across the tail end of the body and knot. Insert the cardboard. Stuff the head portion of the body with wool. Start sewing up the tail from the tip of the tail to the middle of the body. After you get about 3/4 of an inch sewn, finish stuffing the body. Sew the hole closed and then knot. Trim the extra floss and you end up with this:
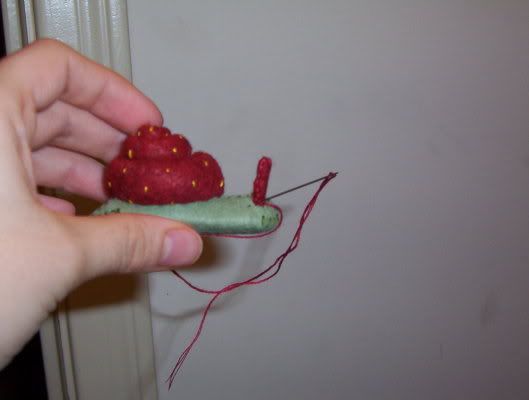
Attaching the body to the shell
Sew the shell onto the body using the floss that is still attached to the shell. You may have to shape the shell a little by pinching it to get it to site properly on the body. There is no real trick to sewing the shell on, so I didn't take any pictures. Just go in and out of the body, then go in and out of the shell, repeat all the way around the shell until the shell is firmly attached to the body. Knot and trim the floss.
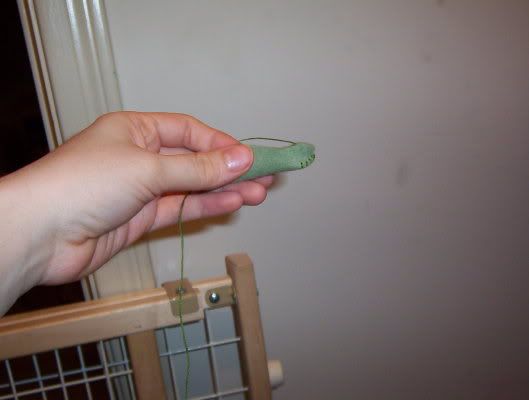
The Horns
Take one of the horn pieces and fold the felt over. Sew up one small side and down the long side. Then sew onto the head.
Knot and trim the floss. Repeat with the other horn.
Now you have a snail!!!!!
Your snail options are unlimited!