Showing posts with label reuse. Show all posts

Wednesday, January 11, 2012

Icicle spirals out of tp rolls!!!

saw this video on youtube:
http://www.youtube.com/watch?v=wCHQmOJuhk8
and was inspired to make some icicle spiral ornaments from toilet paper rolls. However, I didn't like the thickness of the ornament she made and I wanted mine tapered. I was able to make 4 icicles out of 1 toilet paper roll. I didn't add the beads or bows that she did in her tutorial and I used paint. I think they turned out well.

Here are my first attempts:


As you can see, the shapes are irregular and they don't all curl well. Well when you are cutting open the toilet paper roll along the seam, there is an overlap area of about 1/4" to 1/2" that you need to cut off or that piece won't curl well (as you can see in the second from the left in both of the top 2 pictures). I also came up with a way to cut the icicles so they all look somewhat uniform in size. I also used a thin hole punch in the top of the ornament and strung metallic red cord in the holes to hang.

Here is what I came up with:


Hints:
1. Paint several layers. Don't try to coat the cardboard with one layer, it won't coat evenly. Paint a primer, gesso or base coat before painting your final color. Metallic or pearly topcoats look really good on these, but even those may take a few layers to get a good coat.
2. If using glitter, paint the glitter area a coordinating color first.
3. Try to use micro or ultra fine glitter. I don't think chunky glitter will look as good on these.
4. Reshape (curl) the icicles while the paint is not quite set. Basically when its dry to the touch but still really cool/cold, the icicle is more flexible during that time.

I might do a step by step tutorial if there is any interest.

Tuesday, January 3, 2012

Novel Wreath and other stuff made from recycled books


I ran across this video on youtube and thought I'd give it a try:

http://www.youtube.com/watch?v=8u3cpr8WcmM

I did several things differently though.

1. I wrapped my wreath form (which I got at the dollar store) in book pages. I figured I had plenty and if I didn't quite get the wreath covered in roses, then it wouldn't show.

2. The instructions tell you to make the roses using 3 book pages that are stacked together. I made different kinds of roses (I wanted smaller blossoms). I made some only using one page, some with 2 pages and some with 3 pages stacked.

3. I used regular scissors and fancy edge scissors for some of the cutting when I made the spiral cuts to give it different looks.

4. I used 2 different red ink pads and one silver ink pad to give some of the pages color before I cut the pages into spirals.

5. I used a very thin knitting needle (a skewer would work also) to start the wrapping process. It was just easier for me. I also put a little bit of glue on the paper when I began the spiral so that it stayed in place better. Just be sure you don't glue the paper to your knitting needle.

6. I used 2 different sized pearl beads also.

Here's a close-up:


I also made a small ornament doing the same technique. I just used smaller pieces of paper and I covered a styrofoam ball.


I was having so much fun with the book pages I decided to see what else I could make with them. But I also decided that ink was too expensive for this kind of project, so I decided to use watercolors instead. It went further and didn't cost nearly as much to paint the pages first and let them dry, then cut them or fold them into the shapes I wanted.

First I followed these directions: http://knittygrittythoughts.typepad.com/knitty_gritty_thoughts/2009/11/my-entry.html
but used book pages and hot glue to make this:


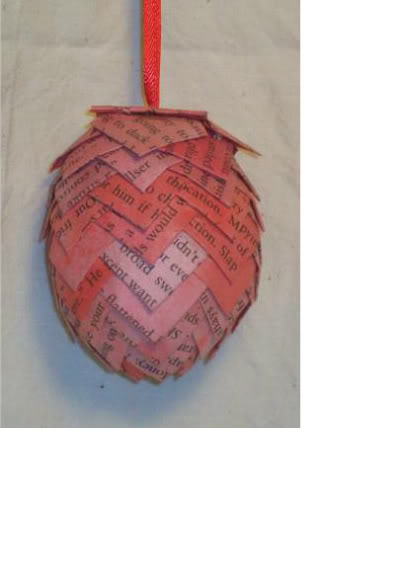
It really looks like an artichoke. I wanted to make one that was more of a pinecone shape so I had some plastic Easter eggs, used the watercolored paper and came up with this:


And for giggles here's an ornament I made using one of the watercolored pages beads and embroider floss:


I can't remember where I found the instructions for this one, but it was easy to make.

I was doing all this when I was supposed to be putting the finishing touches on my Christmas gifts I was making. Hey it was productive procrastination, LOL.

Saturday, October 1, 2011

What's the easiest stuff to recycle

My local suburb doesn't have curbside recycling. You have to hunt down where you can take your recyclables. But here are a few things you can recycle with little to no effort:

- Gift bags - this should be a "well duh!" but you would be surprised at how many birthday parties I've been to where these get thrown away. All you need to do is empty them, take off any tags and fold them and put them away for another use. Next party/holiday, pull one out and reuse them. Plus it saves you money on buying gift bags in the future. Win-Win!

- Tissue paper - now I know not many people think of this. Some people who save gift bags often don't save their tissue paper from those gift bags. All you need to do is take a few seconds to smooth it out and fold it up to store. When you put paper into gift bags, it gets crinkled anyway so don't sweat it. I only throw out tissue paper that is horribly wrinkled AND torn.

- Glass Bottles and Jars - I don't know of a local recycler of glass (I haven't really looked since I reuse almost all of my glass bottles and jars). Bottles and jars can be reused to store tons of stuff from nails to craft supplies to leftover food. They can also be used as crafts themselves. I use alot of mine to make halloween props.

Notice I didn't mention cans, newspaper, plastic. I figured those were well duhs also.

I just wanted to mention a few things that may be overlooked at your house.