Showing posts with label Christmas. Show all posts

Wednesday, January 11, 2012

Icicle spirals out of tp rolls!!!

saw this video on youtube:
http://www.youtube.com/watch?v=wCHQmOJuhk8
and was inspired to make some icicle spiral ornaments from toilet paper rolls. However, I didn't like the thickness of the ornament she made and I wanted mine tapered. I was able to make 4 icicles out of 1 toilet paper roll. I didn't add the beads or bows that she did in her tutorial and I used paint. I think they turned out well.

Here are my first attempts:
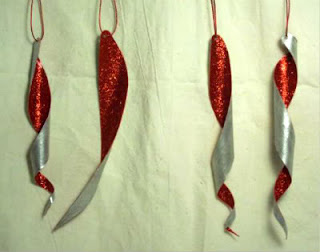


As you can see, the shapes are irregular and they don't all curl well. Well when you are cutting open the toilet paper roll along the seam, there is an overlap area of about 1/4" to 1/2" that you need to cut off or that piece won't curl well (as you can see in the second from the left in both of the top 2 pictures). I also came up with a way to cut the icicles so they all look somewhat uniform in size. I also used a thin hole punch in the top of the ornament and strung metallic red cord in the holes to hang.

Here is what I came up with:


Hints:
1. Paint several layers. Don't try to coat the cardboard with one layer, it won't coat evenly. Paint a primer, gesso or base coat before painting your final color. Metallic or pearly topcoats look really good on these, but even those may take a few layers to get a good coat.
2. If using glitter, paint the glitter area a coordinating color first.
3. Try to use micro or ultra fine glitter. I don't think chunky glitter will look as good on these.
4. Reshape (curl) the icicles while the paint is not quite set. Basically when its dry to the touch but still really cool/cold, the icicle is more flexible during that time.

I might do a step by step tutorial if there is any interest.

Monday, January 9, 2012

Mom's Christmas gift - Red Dragon Scale Shawl

I started mom's gift back in February. I had been on youtube and saw someone do the crocodile crochet stitch. I thought it was pretty and really lent itself to a shawl. Well a few years ago, mom had asked me to make her a shawl. Better late than never.


I did change the stitch up a bit. I wanted the stitches to look more pointed and less rounded. So I added an additional chain stitch between the 2 sets of 5 double crochets. If you are familiar with the pattern then you probably know what I'm talking about. I just did the stitch until I thought it was long enough. My mom was into WOW and other fantasy stuff so I made her a "Red Dragon Scale" Shawl. The points really do make it look more like scales.
I got on Youtube to look for the crocodile stitch pattern that I saw so I could link it for you guys and found where someone actually put together a video for how to make a shawl using this technique. I haven't watched the whole thing (I only watched the first 5 minutes), but it looks similar to how I did mine:
http://www.youtube.com/watch?v=0LiH9Wk3rHc

This isn't exactly how I made mine, but it looks pretty close.

Emily's Christmas Present 2011

Well since I was blessed with 2 stinky boys and no girls, I got to endulge myself this Christmas and make Emily some dress up clothes. I stared off making some tulle tutus. When I was researching how to make them. I ran across a blog that told you how to cut them quickly and easily. For anyone who has ever worked with tulle, knows that is a welcomed blessing. Tulle is horrible to work with. Here's the website: http://treasuresfortots.blogspot.com/2009/10/cut-tulle-for-tutu-using-quick-and-easy.html

Here's the first one I made:

It was made from the thicker bridal mess, not tulle. I didn't have enough of anyone color to make the tutu so I used all 4 colors (fushia, purple, turquiose and green).

Keeping with the theme of only using what I had on hand, I made a halloween inspired one:

I had just a little bit of black and plenty of the orange.

Black and white:


Maroon and white:


Purple and white, with ribbons:


I made all of these with elastic waists. I went back and forth. I had thought about making them tie on but I figured they would get more play if they were easily pulled on and off.

Well, I put these all in a paper box and had plenty of room so I got to thinking, "What else can I make?" WANDS!!!

So I went to Hobby Lobby and bought dowels and wooden balls that had holes that did not go all of the way through (in other words I didn't want big beads). These were the only supplies I bought for ALL of Emily's gift, everything else was from supplies I already had. I used some star shaped cookie cutters and copied the shapes onto felt and made padded star topped wands. I painted the wood pieces and added ribbon. Here's the result:


One set of barretts. I just couldn't help myself. I wanted to try these out. I might have to make more:


I also made "Boas" out of fun fur and other fuzzy yarn from my stash. They knitted up quickly. the white was actually made on a knitting loom.


And last but not least, I pulled out the 2 alien washclothes from my "to be finished pile" and decided to make Emily a purse. I used some scrap green fabric with white polka dots (from the Dr. Suess outfits I made my boys years ago) to line the purse. I already had the handle knitted as well. I have no idea what I was going to use that piece for. All I had to do was put it all together. Sew the 2 wash clothes together and then the strap on. Sew the cloth together and then sew it to the rest of the purse. I think it turned out cute:

I didn't go so much for "matching" as "make a bunch of cute stuff and fill the box", LOL! I had a BLAST making it all. I had a few more things planned to put in the box, but I made myself stop.

And for giggles, here she is opening it with mommy:

She had to try it on right away so I call that a success.

Gifts for Classmates and Teachers - Winter 2011 edition

Well I did my typical "Should I make something for my kiddos classes or not" that I seem to do every year. I don't know why I do this. I ALWAYS end up making something for them, this year was no different.

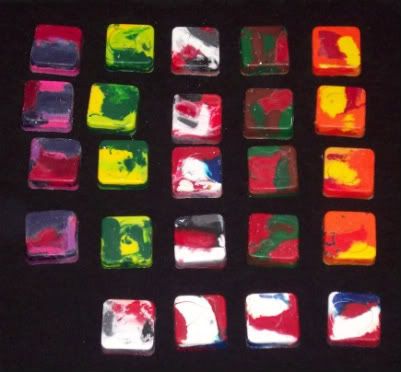
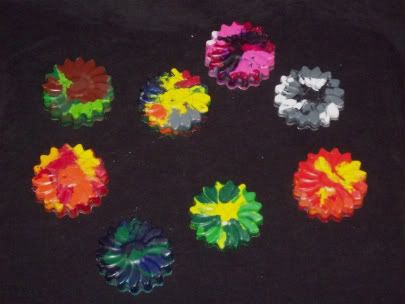
For Gavin's class, I just made crayons.


I melted crayons in molds and packaged them up for the kids.

For Colin's class, he and I made page corner book marks. I saw these on pinterest and just had to give them a try. They turned out great. We made 2 for each kiddo. Here they are all packaged up (Sorry we didn't get any close ups):


Here are the directions: http://nheilke.com/blog/?p=2628
We didn't make them monster style. We made the ones that are about halfway down the page.

Now, what to do for the teachers. Well I had a ton of really good ideas that seemed to keep getting waylaid (couldn't find the paint I needed, lost most of my project, etc). So I finally went with a backup... winter themed DISHTOWELS!! I bought a bulk group of washclothes and followed this pattern: http://kleiosbelly.files.wordpress.com/2010/01/hanging-dishtowel-pattern2.pdf I used washclothes instead of cutting a dishtowel in half. I made a TON of these for Colin's one teacher, Gavin's 4 teachers, 4 aides, speech therapist, swim instructor and the boy's piano teacher (I think that was everyone, and everyone got 2). Anyway here they are:


And of course, all of it was done at the last minute.

Wednesday, May 18, 2011

Kids' Christmas handouts 2010

I know, I know, I've been uber slow about posting. I haven't down loaded my camera in a while and before I knew it, months had gone by and I still had stuff to post so here it is.

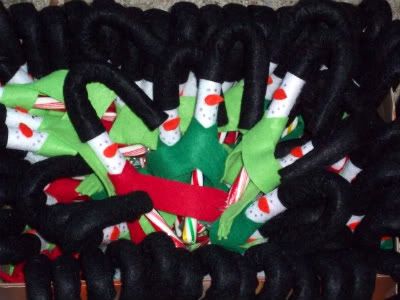
I made these Snowmen Candy Cane Covers for my sons' classes & teachers for the winter holidays

Photobucket

And of course, I didn't make sure I had a good shot, so this is my only shot of the candy canes. I think I made between 60-70 covers.

Friday, January 8, 2010

More Gift Bags

I've been working on different patterns for gift bags. I don't want just plain rectangle bags. I want pretty bags that I'm happy to use year to year. Here are my latest bags.....

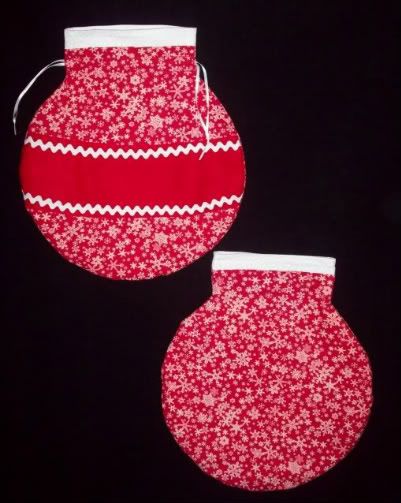
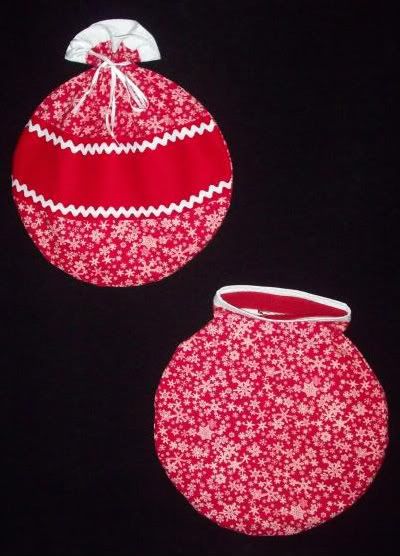
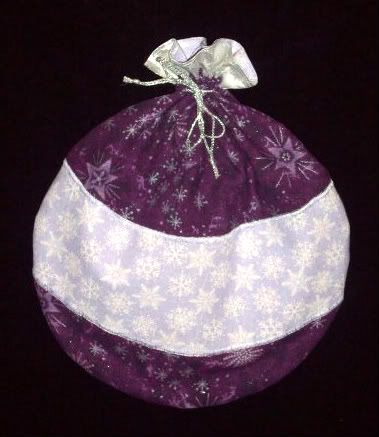
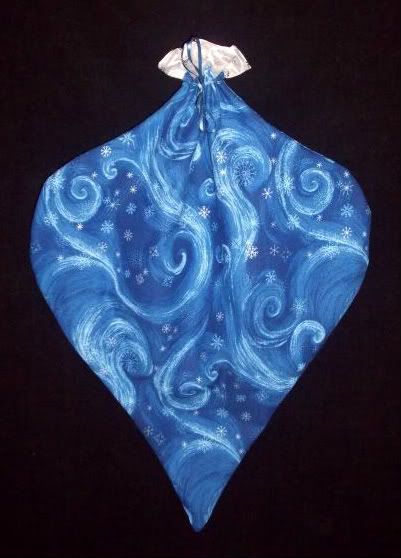
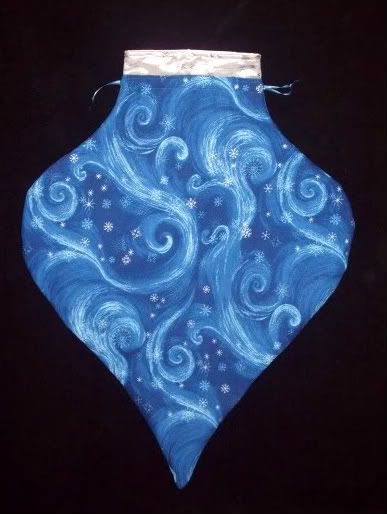
Ornament Shaped bags:
The first bag I made is the one on the bottom. I used hook and loop tape for the closure on it. The top bag was made with drawstrings and was the second bag I made.

Photobucket

I'm still tweaking the pattern. Here they are with the drawstring closed and the other open so you can see the hook and loop.

Photobucket

Here is another using the same pattern after I tweaked the stripe part of the pattern:
Photobucket

Photobucket

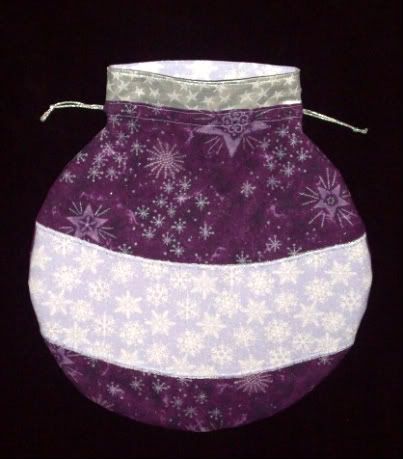
Here is the second ornament pattern I've come up with so far:
Photobucket

Photobucket

I like the way they have turned out so far. I'm still tweaking the pattern. I'm actually thinking of writing up this pattern to sell but we will see if I get around to it.

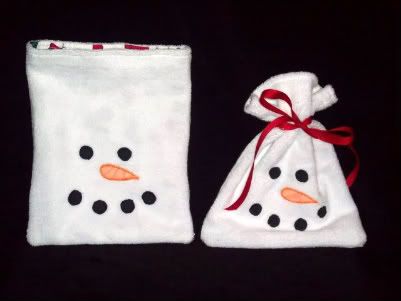
And last but not least are the other snowmen bags that I finished.

Photobucket

Tuesday, December 15, 2009

Teacher gifts

Here are the teacher gifts I made for the boys' teachers this year for Christmas.

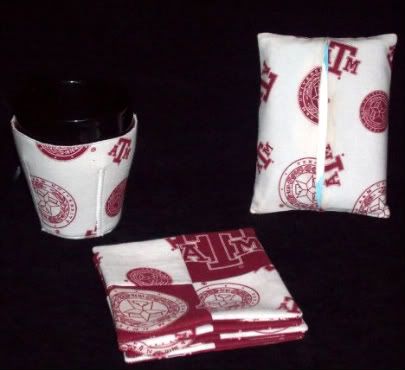
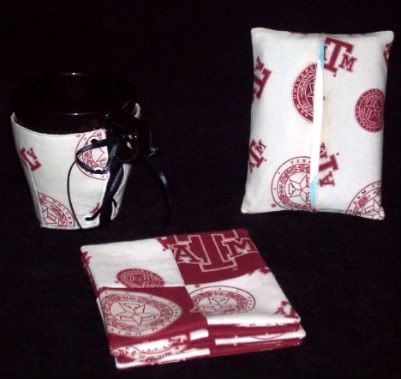
For Colin's Teacher (who is an Aggie):
Photobucket

Photobucket
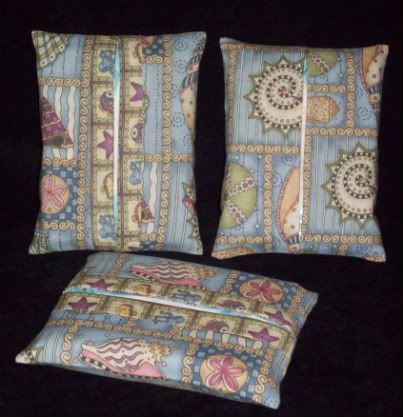
The Tissue Holder is a Puff to go tissue holder. The coasters are the crisscross coasters. The coffee mug corset cozy is my pattern. I'm not overly happy with the grommets on this one. They didn't set like they were supposed to, but I couldn't take them off, once I put them on.

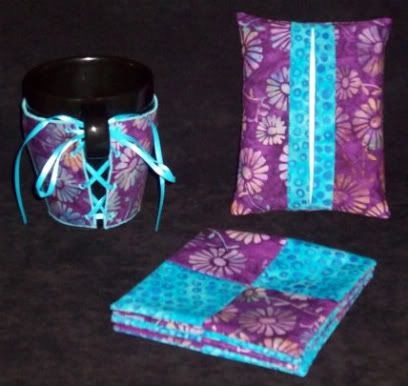
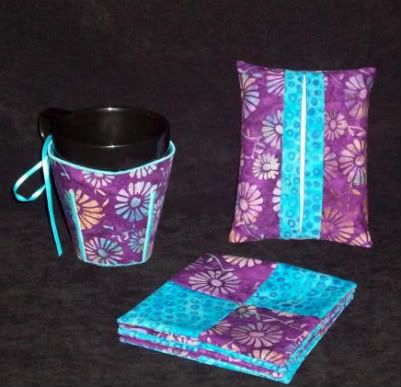
This set is for Gavin's Teacher (Gavin picked the purple fabric):
Photobucket

Photobucket

Same set that I made for Colin's teacher, but I hand embroidered the openings for the lacing on this coffee mug cozy. I picked the turquiose coordinating fabric for this set.

Gavin's aides and math teacher:
Photobucket
I made each of them a puffs to go tissue holder. I'm putting them in a special gift bag (I've only made one so far).
Photobucket
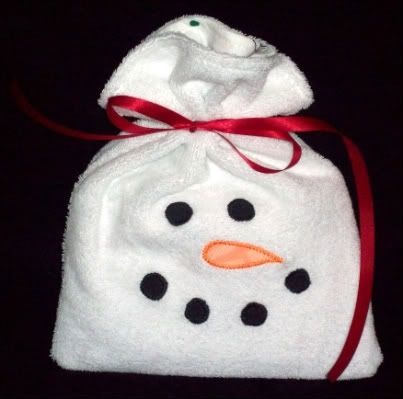
I'm hoping to make some bigger ones for the boys regular teacher too. I made the one above out of left over microterry that I had left over from my diaper making supplies. I used scrap fabric for the nose and coal mouth and eyes. The lining fabric was some Christmas fabric that I wasn't overly fond of after I bought it. It was too thin to use as gift bag fabric on its own. As a liner for the microterry, it works great.

And last, but not least, I made some more crayons for Gavin's classmates.
Photobucket

Photobucket
2 of the ones in the photo above are ones I made before, but the rest are new.

Monday, December 7, 2009

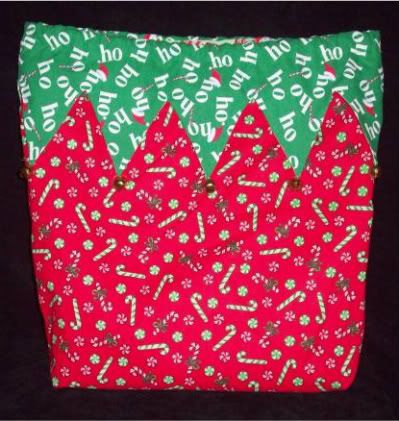
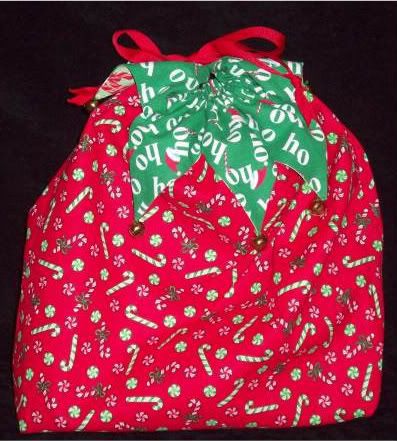
Christmas Gift Bags

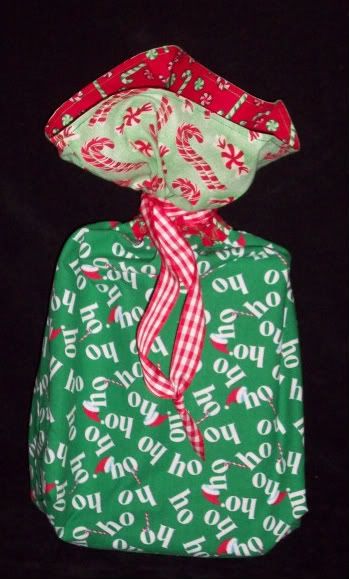
Well I made some more gift bags. I'm hoping I'll have time to make more before Christmas. Some of these I made from patterns so they are alot smaller than I'd have made on my own, but they turned out adorable so thats okay, LOL.
Most of these bags are made from 3 different fabrics but some are made from only 2 different fabrics. I almost always line my bags so that you can't see through the fabric to the present inside.

This first one is my own pattern:

Photobucket
Open - this is made from 3 different fabrics, has drawstring ribbon and jingle bells

Photobucket
Closed - I love the way this one turned out. I only have one complaint, the gap in the top is too big when you have the bag pulled as closed as the fabric will allow. I need to tweak the pattern a bit, but you can't tell and I always put out presents on Christmas eve anyway, so there won't be any peaking.

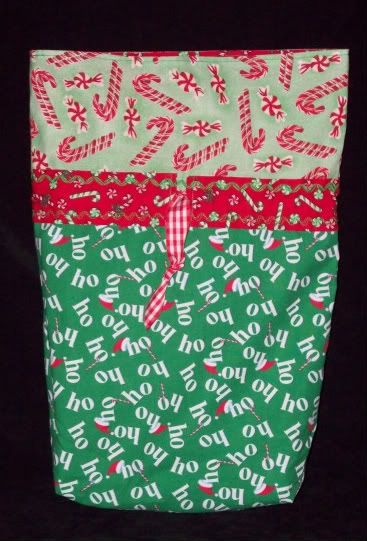
My pattern, I used three different fabrics:

Photobucket
Open

Photobucket
Closed and tied

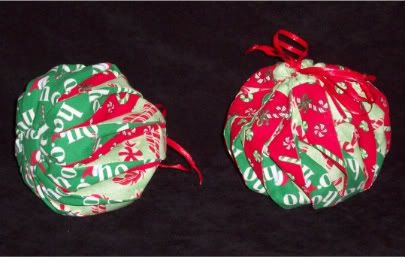
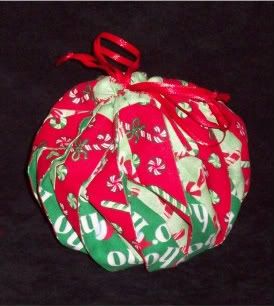
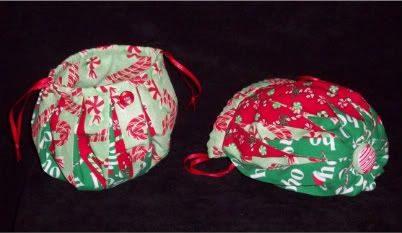
The next 2 were made from the pattern/directions from a book called "Omiyage" by Kimiko Sudo. The pattern is called Candy Twist (ironically enough) The bags turned out pretty small and they took 4-5 times longer to make than I usually spend on a gift bag but I think the results were worth it. I had to tweak the pattern just a little to suit my taste after making the first one, but it was no big deal.

Photobucket
Here they are open and flat.

Photobucket
And here they are drawn up. When they are drawn up they look like Christmas ornaments.

Here is a close up:
Photobucket

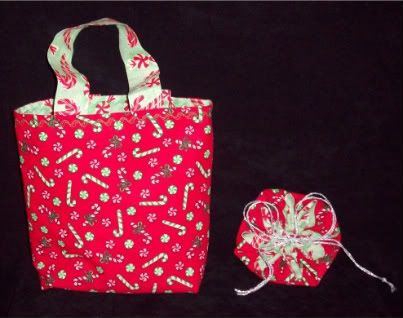
Here are the last 2. The bag on the left was made from left over fabric with no pattern at all. I just didn't want to waste the fabric so I made a small bag. The bag on the right is from the same book from above but this pattern is called Chrysanthemum. Its very small and would only really work for jewelry.

Photobucket

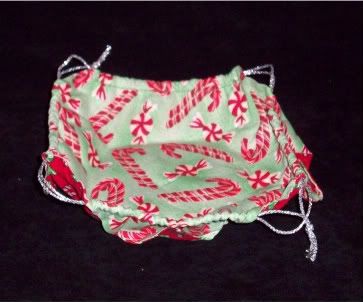
Here is the Chrysanthemum bag opened:
Photobucket

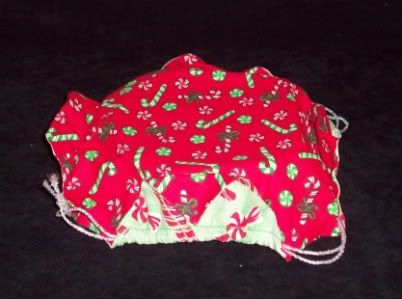
Here is the bottom of the Chrysanthemum bag:
Photobucket

Hopefully I'll have more bags to show you in the near future. I know I won't be making my New Years resolution but I'll try to atleast make a few more. I'm thinking of increasing the size of the candy twist bag. Plus I just need to make some more bigger bags.

Friday, January 30, 2009

My New Years Resolution

Well it seems every year for the past few years, I have the best of intentions to make cloth giftbags and wrap for Christmas and Birthdays. I never seem to get around to it. So that is my New Years Resolution..... to make at least 50 cloth gift bags and/or cloth wraps this year for my own personal use. I'm also thinking of making so to sell, so you see why I put that last bit in. Well I've gotten a good start this year. See what I have done already.

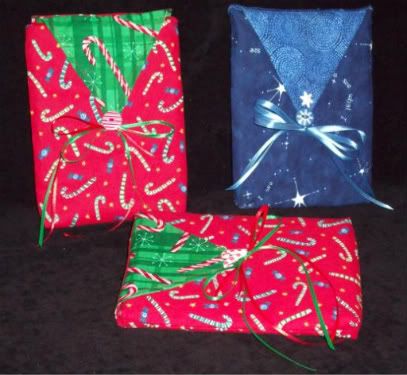
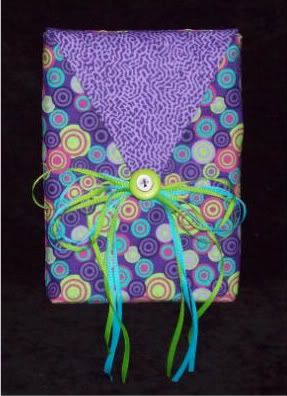
Here are 1-8 of the the 50 I'm making. Yep I've been a busy bee.

The first 4 are Media Gift bags that can hold dvd's/Wii games/Playstation games/books/etc. I'm still tweaking my pattern but I think I've almost got it perfected. I'm hoping to sell both bags and possibly the pattern to make the bags soon. I think I'll have it for sale soon. I'm still trying to write the directions, tweak the pattern, etc.

Anyway here are the first 3 in Christmas fabric:

Photobucket

This next one is another Media gift bag that I made especially for my neice. Her birthday was this month and we got her a game for her Wii so I had to make a gift bag for it, LOL. I think this one is my favorite that I've made to date.

Photobucket

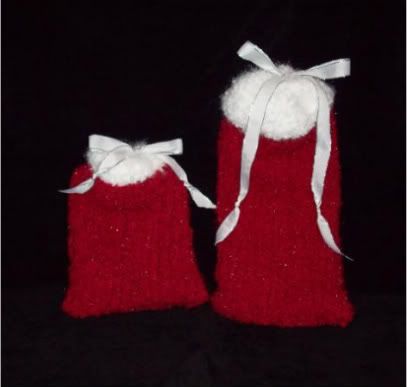
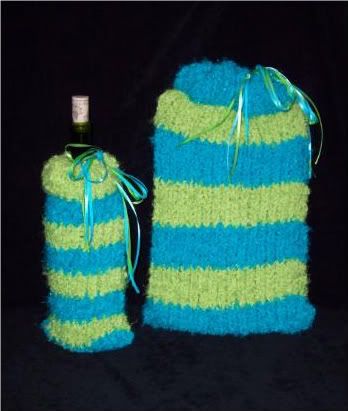
The next 4 gift bags were made on my circular knitting looms. I made them using different size looms (I have a set of 4 looms) and made them to different lengths. I think they turned out fabulous, LOL. I made them using Yarn Bee "Airy" yarn. The results are awesome and I love how they sparkle.

The first 2 are my "Santa" bags. I made them out of traditional red and white and I just LOVE how they turned out. I used the same sized loom for both (the 2nd smallest loom) but I made one longer than the other.

Santa Style Gift Bags

The last 2 are my tribute to Dr. Suess bags, LOL. When I saw these 2 colors together I just had to make a couple of gift bags out of them. The small one is made using my smallest loom and it makes the perfect bag for wine bottles and smaller items. The larger bag was made with my second largest loom and took a while to make. I think the results speak for themselves....

Photobucket